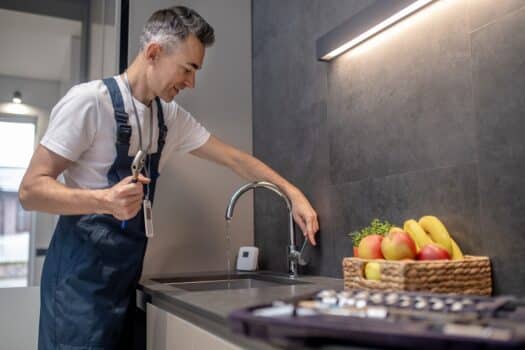
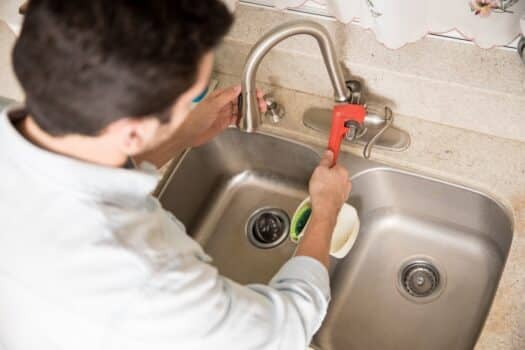
To be honest, acquiring the best kitchen sink faucet is just the beginning, as replacing the existing faucet with it can be a challenging task.
Typically, most homeowners call for help when it comes to replacing any kitchen fittings. But, it can actually be useful to learn how to replace a kitchen faucet, especially for times when a plumber isn’t available.
Yes, we know that changing a faucet looks a bit complicated at first, particularly when it comes to dealing with the supply lines. That’s why we have created this guide to let you know everything about the process of replacing a kitchen faucet all by yourself.
We will provide simple tips and tricks so that even a beginner can remove the old faucet and replace it with a new one without much hassle.
Before we proceed with the article, checkout our previous article on the minimum laptop for graphics design to enhance your knowledge with the information.
Let’s begin!
Steps To Replace A Damaged Or Old Kitchen Faucet

Before you replace the kitchen faucet, it’s essential to plan out the project like other DIY tasks. First, study the current faucet carefully to note things like its spout height, sprayer style, and the number of handles. Also, check your sink to see how many holes are there to choose an appropriate faucet.
Even though changing a typical kitchen faucet is pretty straightforward, we will still recommend brushing up your knowledge on things like the water lines. And don’t forget to allow yourself some time as you may not be able to replace the faucet in less than an hour like a plumber.
Lastly, gathering the tools you need for the installation is important. Here are some of the tools and materials we recommend to make the process easy –
- Locking pliers
- Wire brush
- Lubricant spray
- Adjustable wrench
- Hacksaw
- Sheet of plywood
- Work light
- Painter’s tape
- Drill
- Pilot drill bit
- Hole saw drill bit
- New kitchen faucet
Now, let’s have a look at the steps you’ll need to follow to replace a kitchen faucet.
1. Select A Proper Replacement
We cannot reiterate enough the fact that you need to find a proper faucet that matches your kitchen sink. So, look at the existing faucet as well as your sink very carefully to note the things that your new faucet should have. If the current faucet has a traditional separate sprayer, you may want to upgrade to a modern pull-down faucet with a built-in sprayer.
Remember to buy a faucet matching the number of holes in your kitchen sink. If you want to go forward with a one-hole faucet for a three-hole sink, ensure that it comes with a proper escutcheon plate or base plate for the extra holes.
Rather than just inspecting the countertop and sink, you should also check underneath the sink to locate the holes and connections.
2. Shut Off The Water Valves
Irrespective of whatever plumbing project you’re working on, remember never to touch any water lines before shutting off the water supply. You’ll typically find the on/off valve below the sink to shut off the hot and cold water supply line.
When dealing with old plumbing fittings, the on/off knobs might be rusted. In that case, we recommend shutting off the main water supply valve of your home, which is usually present in the basement or any place where it’s connected to the outer line. Sometimes, you can even take a pair of pliers and turn off the water supply from the main meter.
Once the water supply is off, take the plier to turn off the valves present under your sink by applying a bit more pressure. However, be careful, as applying too much pressure may break old, rusted valves.
3. Prepare The Workspace
Let’s begin by saying that installing a kitchen faucet isn’t a pretty task. You’ll most likely squeeze yourself into the small cabinet space under your sink to access the water supply lines, water filter, and garbage disposal. As the cabinet floor tends to be higher than the usual kitchen floor, we recommend laying down a piece of plywood that would fit inside the cabinet.
This should support your back and make working on the water supply lines more comfortable. However, some people just lay down a towel instead of using plywood, and remember to clean the area under your sink to easily access the plumbing fittings.
4. Remove The Old Faucet
Yes, it’s finally time to get your hands dirty as we’re going to take out the old faucet. This process should be pretty easy once you have loosened the nuts and pipes present under the sink.
If the space seems too dark, do use a lamp to see the fittings before using an adjustable wrench to remove the nut. In most cases, this nut tends to be too tight, so use a bit of special lubricating or penetrating oil like liquid wrench before unscrewing the nut. If the faucet is extremely old, you might need to wait overnight for the nut to loosen for easy removal.
But if you want an even more effective tool, think about using a faucet wrench tool.
5. Clean The Sink Holes And Make New Ones
After removing the old faucet, you’ll be able to see the number of holes present in your sink. You should also note the distance between the different holes to figure out if the faucet of your choice will fit into them.
However, the first thing you should probably do is clean out the dirt and debris by the deck plate. You might find that the old foam seal is a bit tight, but lifting it with a putty knife or screwdriver is pretty easy.
Once you have cleaned the holes, it’s time to drill extra holes if necessary to accommodate a three-hole faucet. Just make sure that the extra holes are aligned properly with the center hole.
While boring the holes with a drill is pretty easy on the sink, we recommend hiring a contractor to add holes on the countertop for a countertop-mount faucet. For the sink, cover the majority of the sink area in painter’s tape and mark the placement of each additional hole. Use your drill to make a pilot hole, then use a hole saw drill bit to make it bigger.
6. Install The Deck Plate
The next step is installing the deck plate over the holes in the sink. This should be fairly easy for single-hole faucets as you’ll need to align the deck plate with the center hole. Ensure to follow the manufacturer’s instructions so that the deck plate fully covers any extra hole in the sink.
You’ll possibly need to place a rubber or plastic gasket on the holes and place the deck to maintain a tight seal. Then apply plumber’s putty to make sure that the deck doesn’t budge from its place.
7. Install The New Kitchen Faucet
Finally, it’s time to install your kitchen faucet but before you do that, check out the instructions, such as how to replace a two-handle sink faucet. This will give you a fair idea of how to deal with the various parts of the faucet as well as its connection to the supply lines.
The first step is usually to put your faucet through the center hole with multiple handles or parts. Then, you’ll need to attach the washers and mounting nut underneath the sink using a basin wrench.
Don’t forget to check the faucet from above to ensure that it’s secure and adjust the nuts if necessary. In some faucet models like the Pfister Top Pfit, you can fit the faucet from above without much hassle.
8. Connect The Faucet Supply Lines
We know that connecting the water supply lines can be a bit overwhelming for beginners. But, there’s no need to worry as modern homes have simple water lines, and even the faucets are labeled. You’ll just need to attach the supply lines with the corresponding water supply valve. The color coding is usually red for the hot water line and black or blue for the cold water line.
Remember to wrap Teflon tape counterclockwise with the threads of each valve to ensure a proper seal. Secure the nuts of the hot and cold water supply valves using a wrench and avoid damaging any of the connections. Once the water supply lines are connected, you can turn on the shutoff valves.
Note that for single-handle faucets, the water connections are typically part of a single spout assembly. Whereas, in a double-handle faucet you’ll need to attach separate hot and cold water supply lines. If you find the supply line connections challenging to understand, do contact a plumber for clarity.
Follow the instructions provided by the faucet manufacturer to install other parts of a faucet like a separate sprayer. When everything is in place, you can test the faucet to check whether it’s working properly. Don’t forget to turn on the primary water connection to your home or kitchen if you turned it off before installing the faucet.
9. Check For Leaks
Last but not least, it’s time to check for any leaks that might exist due to improper installation. Turn on the water, let it run for a minute and then observe each connection as well as the faucet body for possible leaks.
In case there’s a minor drip, adjusting the connections with a wrench will fix it. Keep an eye on the faucet for the next 48 hours to fix any leaks as soon as possible.
When To Call A Plumber?

Even though it’s a nifty idea to learn how to replace a kitchen faucet, at times, you just need to call a licensed plumber. If you have doubts like “do undermount sinks have faucet holes?” it’s a sign that the installation is more challenging than usual kitchen faucets.
Here are some of the most common situations that require professional help:
A. Wall-Mounted Faucets
In case your kitchen happens to have a wall-mounted faucet, replacing and installing a new faucet can be a bit challenging and would need expert supervision. When installing a wall-mounted faucet, people tend to get confused between the hot and cold supply lines, which can lead to damage.
This is the only downside compared to installing a traditional sink-mounted or countertop-mounted faucet. Moreover, installing a wall-mounted kitchen faucet often requires extra tasks like installing water supply lines or a sink which should only be handled by experienced plumbers.
B. Inability To Reach Parts Of The Old Faucets
Have you just moved into a new house that still has old plumbing? Contact a plumber to take out the current kitchen faucet. That’s because accessing the water supply lines or even the sink drain trap can get pretty challenging as there tends to be additional plumbing.
A better option would be to seek out a local plumber who has experience working with such old fittings to get everything sorted. They can also help you upgrade the kitchen sink and faucet to models that match your modern taste.
C. New Kitchen Faucet Is Leaking
At times, even when you have followed all the steps of the installation correctly, there can be some mishaps, one of them being a leaking faucet. If you come across such an issue, it’s recommended to contact a plumber to get it checked as there might be existing problems in the supply lines or connections.
Remember to run tests soon after installing a new faucet, as hidden or slow leaks can be pretty problematic in the longer run.

How To Change A Kitchen Sink Faucet Frequently Asked Questions ?
How often should you replace a kitchen faucet?
In general, kitchen faucets are meant to last for around 15-20 years. However, that’s not always the case, especially when the faucet is made from inferior quality materials. While faucets are available at a cheap price, it’s recommended to buy a good-quality faucet so that it lasts for a long time.
Other than that, we would recommend keeping an eye on your current kitchen faucet so that you can catch problems as early as possible. In case you need to repair it frequently, a better option would be to get it replaced with a new faucet to save on the repairing cost.
Faucets might also get damaged sooner due to improper use and bad water quality. If you suspect such issues, get your kitchen faucet checked by a plumber.
How do you know if a kitchen faucet is faulty?
To be honest, judging if a kitchen faucet needs to be repaired or replaced can be pretty challenging. However, some of the tell-tale signs include:
- Constantly dripping water
- Faulty or squeaky handles
- Soap dispenser doesn’t work
- Aged 15-20 years
- Damaged kitchen sink
- Too much mineral deposit
- Rusted
- Has already been repaired multiple times
- Loose faucet
- Poor water pressure
You should ideally change a kitchen faucet if it’s of an older model. Many people even like to upgrade the kitchen faucet after moving into a new home to install more water-efficient options. Moreover, replace the faucet if it’s dispensing low-quality water even after installing a water filter or softener.
How to choose a new faucet for your kitchen?
There are several factors that should considered while picking a new kitchen faucet. Here are some of them:
A. Spout Height And Reach
Kitchen faucets are often categorized based on their spout height and reach. Finding a faucet with the right measurements is quite important to make sure that it matches your kitchen sink. You should also choose a spout height and reach based on the size of frequently used utensils.
In case there’s a shelf above your sink, make sure not to pick a faucet that is too tall, or else it won’t fit.
B. Sprayer Style
It’s needless to say that kitchen faucets are available with different sprayer styles. The common variants are pull-down sprayers, pull-out sprayers, and side sprayers.
While pull-down sprayers are by far the most common faucets seen in modern kitchens, you can choose another style based on your preference. Side sprayers used to be popular back in the day, but they tend to leak more often than other variants.
C. Finish
One of the essential features to check in your new kitchen faucet is its finish. While the shining stainless steel may look good in photos, it can become dull in a few years. So, it’s better to choose lasting finishes like chrome, bronze, or satin nickel.
Chrome is believed to be the most long-lasting finish, and you’ll usually see them in hotel kitchens where the faucets tend to get used heavily. Nickel is the next best option, and it’s often categorized as brushed or satin due to its dull shine. Even though they are more prone to catching water spots and fingerprints, most of these faucets are chip resistant.
Bronze faucets, on the other hand, are often called oiled or rubbed as they’re coated with a layer of epoxy. They are definitely tough, but you still need to be careful while handling such faucets.
Having said that, you can definitely go for a fancier faucet finish, especially to match the theme of your kitchen. Just make sure to find out more about the quality so that the faucet lasts for a long time.
D. Number Of Holes In Your Sink
While some kitchen sinks have a single hole, others may have multiple openings to accommodate different accessories like additional sprayers and soap dispensers. If you don’t want to install extras, just find a kitchen faucet with an escutcheon plate that can hide the remaining holes.
The next best option is to find a faucet that comes with double handles along with a side sprayer or soap dispenser. Note that if the holes are wide apart, then the deck plate might not be able to hide them.
E. Number Of Handles
Did you know that some professional kitchen faucets come with up to five handles? It might be tempting to install such a faucet in your home kitchen, but the option isn’t convenient. In fact, modern kitchens often include faucets with a single handle instead of the usual three in the traditional style.
So, pick a faucet with a single handle for convenient temperature controls as well as easy-to-install hot and cold lines.

How To Change A Kitchen Sink Faucet Final Words
You’re all ready to replace a kitchen faucet all by yourself without needing much help. Just remember to have a look at our guide whenever you get confused about any step.
If it’s your first time installing a kitchen faucet, it may take you some time to get a grip on all the steps. However, don’t give up on it, as you’ll eventually get the process right after going through the instructions a few times.
We also want to add that it might be better to contact a plumber if you’re considering upgrading to a more expensive or professional kitchen faucet. Along with the installation, they may even help you make changes to the existing sink and water supply lines.
Until next time, goodbye, and take care!


