Mugs with handmade designs have a certain allure to them that cannot be replicated through more mechanical designing methods like prints.
This allure is the reason why Sharpie mugs have risen in popularity in recent years. And this can be attributed to the simple preparation and designing process that gives mugs the highly sought-after appeal.
So, to help you get started with DIY mug designs, here’s a complete guide to the best ways of designing mugs using Sharpies.
Tip
Note that even the best Sharpie pens on the market may not be dishwasher-safe. So, we recommend hand-washing your mugs to keep your design pristine for a long time.
DIY Sharpie Mug Project Materials

The importance of high-quality materials to create the best DIY Sharpie mugs cannot be understated.
From the quality of the markers you use to the build quality of the mugs, each material listed below has an important role to play. The material quality can be the difference between a vibrant and interesting design and a dull one that may fade over time.
Here’s a list of materials that you need to gather for DIY Sharpie mugs:
- Sharpie Pens
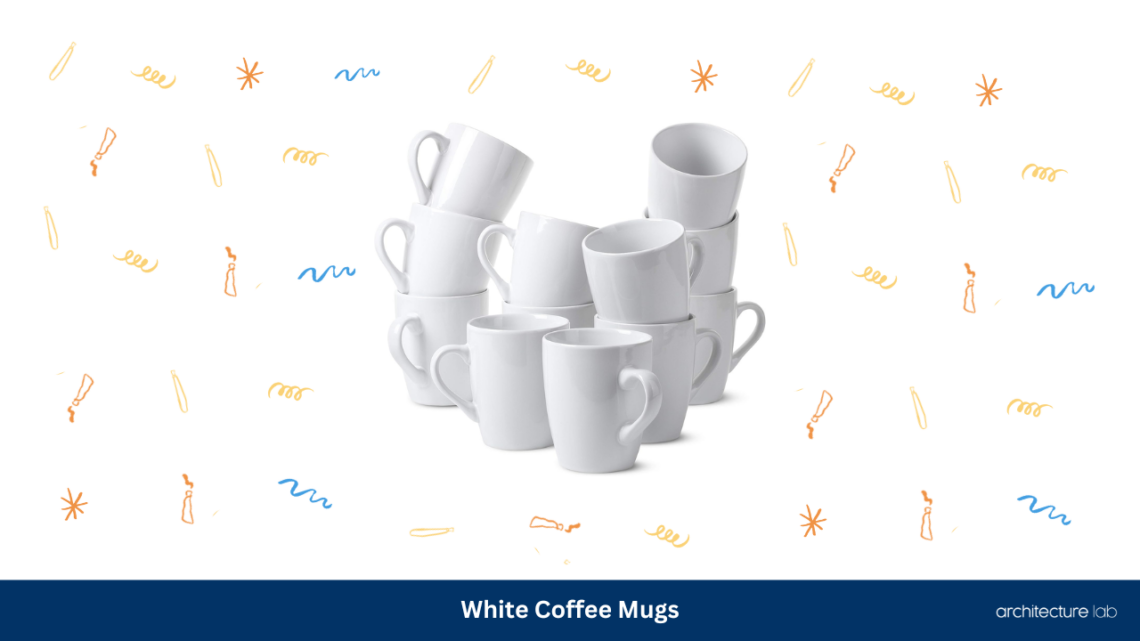
- Solid Color Mug
- Rubbing Alcohol
- Paper Towels
- Masking Tape
- Pencil
How To Make A Washable Sharpie Mug
Step 1. Hand-Wash The Mug
Let’s start by washing the mug completely clean. If the mug has been sitting around for a while, it’s likely to have gathered dust, and your design can become muddy because of it. Even on newer mugs, there can be a few dust particles that can create difficulties while painting.
So, to ensure that there are no stray dust particles on the mug, use dish soap or rubbing alcohol to scrub it well. Once it has been cleaned thoroughly, use a sheet of paper towel to dry it completely, and move on to the next step.
Step 2. Sketch Out A Rough Design
It’s time to create a rough design on the surface of the mug to get a general sense of how the design would appear. A directionless and unfocused design can be quite unappealing, after all.
The first thing to do here is to look up references. Even if you have a design in mind, it’s usually better to look at the possibilities first, and maybe it will help you refine the initial concept more effectively.
Go through websites like Pinterest, Google, Facebook, or Instagram for mug design ideas and see what others have created. This will help you get your creative juices flowing, paving the way for the final design.
Once you have ascertained the kind of design you want on the mug, use a pencil to create a sketch. If necessary, use masking tape to define boundaries for the sketch. The tape can stay on until after you have used markers over the existing design.
Should you run into any issues, you can use an eraser or rubbing alcohol to get rid of graphite from the mug surface.
Step 3. Use Sharpies To Create The Final Design
With the design template created, you can begin using your Sharpies to finalize the design.
Use different colors like red, green, and silver over the design, and feel free to experiment with the design layout. Be careful not to draw over existing strokes to avoid giving the mug a messy look.
Of course, if you ever feel the need to redo it, then use rubbing alcohol to erase it and do it over again. Even so, remember to be careful as the ink from Sharpies dries quickly. You will only have a short window to erase your mistakes before the ink starts to set into the surface of the mug.
After you are done painting the mug, set it aside for about 24 hours before moving on to the next step. If you live in a particularly humid climate, you can leave it aside for at least an hour to account for the moisture in the air.
Step 4. Bake The DIY Sharpie Mug
Put the mug in a cold oven and then turn the oven on. Bake it at 350 degrees Fahrenheit for about 20 minutes, after which you should let the mug cool completely.
With that, you can use the newly-designed mug to drink your morning latte, tea, hot chocolate, or coffee every day. Or, if you so wish, you can pair it with a cookie set, a cupcake set, or a gift card and gift it to a loved one.
Personally-designed mugs make for particularly thoughtful gift ideas for parents on Christmas, Father’s Day, Mother’s Day, or their birthday. It’s a great use of your creativity and makes the recipient appreciate the effort you put into its design.

Painting A Mug With Sharpies Tips and Tricks
Like any do-it-yourself project, there are certain dos and don’ts to keep in mind while making your own DIY Sharpie mugs. After all, the differences in materials and working methodologies can make the job easier for some while becoming a minor hurdle for others.
So, to make your time making DIY Sharpie mugs easier, here are a few tips to keep in mind before, during, and after beginning the fun project.
1. Be Mindful Of Ceramic Glaze
Perhaps the most important aspect of a mug painting project, the ceramic glaze of a mug is something you should not ignore while picking.
Shiny mugs have plenty of glaze on their surfaces, which makes it difficult for the ink from markers to reliably adhere to. The ink from Sharpies tends to bubble up on such surfaces, creating unsightly paint chips in the design that can be difficult to fill.
The baking temperature may be able to fix this issue, but not reliably so. Such mugs only end up making your task more tedious and lengthy, rendering the fun of partaking in more DIY projects null.
Mugs that have low or no glaze work better for painting with most media, showcasing none of the bubbly or crackling effects. Your designs will be in prime shape after the painting process is done and even after a few dozen hand-washes.
2. Clean The Mug
As discussed in the first step of the process, the mug must be completely clean for Sharpies to stick to its surface. But how clean, exactly?
Dirt and dust particles aside, even the oil from your fingertips can cause issues for Sharpies. So, even after hand washing the mug, your fingerprints may have already left an impression that prevents Sharpies from sticking to the surface properly.
That is what makes the role of rubbing alcohol so important. The alcohol ensures that not only is the mug free of any muck, but it also clears out other undesirable elements from the surface.
3. Baking Timing Matters
After finalizing the design, you should wait for at least 24 hours before putting it in the oven. Simply set the mug aside for a full day without being tempted to throw it into the oven immediately.
The reason for this is that if baked immediately, the design may either crack or bubble up or wash off after a few hand-washes. This gives the ink some time to set into the ceramic glaze of the mug, preventing any blemishes from potentially showing up afterward.
4. Place The Mug In A Cold Oven
The oven temperature has bearings on not only the quality of the design but the structural integrity of the mug as well.
When placed in a preheated oven, the mug undergoes a phenomenon known as “Thermal Shock.” This occurs when there is a sudden temperature change, causing undue stress to the structural integrity of the object in question.
So, when you place the mug in a preheated oven, there is a very high chance that it cracks or simply breaks apart. This is a mess that no one wishes to encounter and so you should put the mug in a cold oven. The temperature of a cold oven increases gradually, eliminating thermal shock entirely from the baking step.
5. Keep The Oven Temperature In Check
Baking at a lower temperature for a long time is almost always preferable over baking at a higher temperature for a short period.
Once again, thermal shock plays into this as the mug may crack or break apart when baked at high temperatures. So, let the oven heat up gradually and maintain a decently high temperature instead of exposing the mug to extreme heat from the get-go.
6. Leave The Mug In The Oven After Baking
After baking one or more mugs, don’t open the oven until the DIY Sharpie mugs cool down. This helps the ink from the markers bond with the glaze of the mug while also preventing thermal shock from affecting it.
Note that it can take the Sharpie mug and the oven some time to cool down completely.
3 Unique Ways To Design A Sharpie Mug
Designing your Sharpie mug with a pencil is just one way of approaching the project.
There are several other equally attractive methods to add a unique creative flair to the mug. You can use the vinyl letter technique, the pencil transfer method, or the tie-dye method to make the mug stand out in your collection.
Let’s explore these unique methods in detail.
1. The Vinyl Letter Technique
The vinyl letter technique uses stencil stickers in tandem with Sharpies to create unique and interesting typography on mugs. By using such letter stickers, you can freely paint on the mug without worrying about mistakes or even looking up references.
Simply apply the sticker on the mug and use Sharpies to either trace the boundaries or create a unique pattern around them. Alternatively, use mod podge to make the stencil adhere to, if the stencil doesn’t come with a sticky surface. Once you are done with the design, remove the adhesive stencils to reveal your new design.
Feel free to experiment with various designs to see what works for you, and with that, the mug is ready to be baked.
2. The Pencil Transfer Method
For those who like to avoid the pressure of having to work flawlessly, the pencil transfer method can be a great option. You will have to either design or have someone create the design so that it can be printed afterward.
Use a pencil to shade the back of the design and tape the sheet to the mug with the shaded side facing the mug. Make sure you press the design firmly into the mug while taping the sheet.
Next, trace the design on the other side of the sheet using a pencil. You must press down on the paper a little firmly to ensure the graphite transfers onto the surface of the mug. Make a few passes over the design for it to stick to the mug properly.
Following this, remove the taped sheet from the mug to reveal its new design. Now, you can freely use your Sharpies to finalize the design and have the mug ready to be baked.
3. The Tie-Dye Method
The Tie-Dye method usually involves dipping the mug into a cookie sheet pan filled with paint (usually nail polish), much like marbling. This makes the paint adhere properly to the surface of the mug, creating an abstract and colorful design.
Of course, doing so with Sharpies doesn’t seem feasible, but we have a solution for that. You can simulate the tie-dye effect by creating an abstract design on the mug and smudging it before the ink dries.
So, to create a tie-dye mug with Sharpies, create several large spirals, circles, and other shapes on the surface of the mug. Before the ink dries, pour a single drop of rubbing alcohol or nail polish remover over each shape and let the fluid run off the side.
Keep rotating the mug to distribute the colors across its surface evenly until the alcohol evaporates. And continue to repeat this process until the mug is covered with an abstract and vibrant design.
Add a final touch or two with a name or some typography, and the mug is ready to be baked.

DIY Sharpie Mugs Design Ideas
So, you know how to make a Sharpie mug, but the lack of a clear vision has you stuck on the drawing board? We have a few design ideas for you to sink your teeth into.
Each of the design ideas listed below can be created using the methods detailed in the previous sections. So, draw inspiration from these ideas and experiment with them to your heart’s content.
1. Monogram
Monograms are simple logos that are made using a combination of two or more elements.
When combined with vibrant colors and a simple design scheme, you can create a design with a visual pop to it. Combine bright colors like blue, pink, and purple with tiny abstract shapes to enhance this effect even further.
2. Boho-Themed Design
Channel the boho-chic style that was prevalent in the mid-2000s to create an aesthetic that combines abstract with funk. Combine straight and wavy lines and dashes with typography for an eye-catching and timeless design.
3. Animal-Themed Design
Do you like cats or dogs? Regardless of your preference, you can doodle a simplified likeness of the animal onto the mug for an effortlessly cute design.
You can find plenty of simplified icon-style pet pictures on the internet, so feel free to look them up.
4. Pop Culture-Inspired Mug
Star Wars, Harry Potter, or Doctor Who- there is plenty of instantly-recognizable iconography from every franchise under the moon.
Pick a particular theme or simply doodle away a combination of every piece of media that you like onto the mug. The resulting art is one that appeals to your tastes and is unique to you.
5. Swirls And Spirals
Combine swirls, spirals, and dots for a simple-yet-elegant design. The great thing about this design is that it can fit with nearly every mug design, making it an attractive part of a large collection.

Best Type Of Sharpie Pens For Mugs
With the abundance of Sharpies on the market, it can be a little confusing to know what makes for the best Sharpie paint pens for mugs.
As mentioned earlier, Oil-based Sharpies provide you with the best painting results on more than one mug, along with acrylic and metallic markers. But that is not all that you must look for when purchasing Sharpie paint pens.
Paint type aside, there are two other factors to keep a watch for when purchasing a set of Sharpies. What follows is a brief explanation of why these factors are important and how they help a Sharpie be more suited for painting DIY Sharpie mugs.
1. Usability
The best Sharpie mugs should be easy to use and easy to create thus being comfortable to hold while painting. This is particularly the case for mug painting since the surface of a mug is usually curved, and the possibility of errors is generally high.
Additionally, while handling a task as delicate as mug painting, the permanent marker should not tire your hand out quickly because of its weight. If excessively heavy, the marker will be more difficult to articulate effectively during a painting session.
Feel free to look up user reviews and manufacturer’s specifications to get a general idea of how the Sharpies would feel before purchasing them.
2. Color Brightness
Vibrant colors create the most attractive designs on a mug, particularly if the mug is plain white. They hold the power to grab the viewer’s attention from any corner of the room and potentially become a talking point.
Metallic colors or colors with a brighter hue achieve this effectively, especially when paired with the standard black Sharpie. Be sure to check images from both the manufacturer and other users to gauge the brightness of the product before purchasing it.
Can I use regular Sharpie markers for painting DIY Sharpie mugs?
The ink of regular Sharpies can be washed off, even after baking the design. So, while you can use them for painting, the design will be short-lived.
Can I use Sharpies to paint inside a mug?
While certified by AP to be non-toxic, the brand recommends not using them in areas that may come in contact with food or the mouth. As such, it would be best to use Sharpies to paint the outer surface of the DIY Sharpie mug exclusively.
Are Sharpies waterproof?
Oil-based and acrylic paint Sharpies become water-resistant after being baked. But, as mentioned earlier, the mug must be washed by hand to prevent the design from being washed off.
Final Words
Creating DIY Sharpie mugs is a matter of finding the right materials and the painting method that suits your preferences the best.
The designing process, from concept to finished painting, can take anywhere from half an hour to a couple of hours. Of course, this is solely dependent on the amount of time you spend looking up references and how long it takes you to finish painting.
That said, DIY Sharpie mugs make for fantastic gift items or display pieces that can become the talk of the hour at parties. While it can take a while for more than one mug to be ready to be displayed in your kitchen, the results are well worth the effort!


