Nothing is worse than enjoying peace only to have it ruined by loud noises coming from the neighbor’s house. At this point, you may be wondering about soundproofing walls without removing drywall.
The ideal plan would be soundproofing walls without removing drywall and using acoustic materials to block out unpleasant noise—BUT demolition may not be feasible.
We did some research and came up with 14 techniques for soundproofing existing walls without taking them down.
Let’s go through each one’s specifics and how it will contribute to soundproofing your existing interior walls!
Questions to Consider Before Soundproofing Walls
Depending on your needs, soundproofing walls might be more or less intrusive. Consider your soundproofing project by going through these few questions before you start.
- Budget: What additional funds do I need to allocate for soundproofing existing interior walls?
- Time: If this is a DIY project, do I have the available time?
- Where is the unwanted noise coming from in the room? Are there high- or low-frequency noises? Is the noise only momentary? What is the noise level?
- Does this unwanted noise negatively impact my mood?
14 Ways to Soundproof Existing Walls to Block Sound Waves
There are several simple and affordable options to soundproof your existing walls. Below, we provided several tried-and-true methods to lessen the impact and airborne noise.
The techniques you use depend on the kind of sound you’re attempting to get rid of. Remember that you might need to combine several strategies to achieve the desired results.
1. Add Blown-in Insulation
Low-density cellulose insulation that has been blown is loose and is made primarily of recycled newsprint.
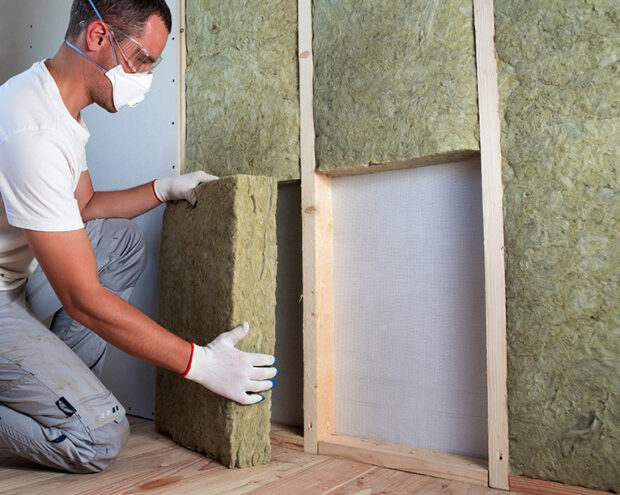
It can be quite successful in helping soundproof interior and exterior walls. It may be inserted into walls after they are built, which is highly challenging with other types of insulation.
Adding blow-in insulation will improve your existing walls’ ability to absorb sounds.
Small pockets of air are trapped by the cellulose, which subsequently captures sound waves and absorbs their energy to cancel the noise before it reaches the other side.
The cellulose insulation can fill all the nooks, crevices, and holes since it is blown in, which is impossible with other types of insulation.
Otherwise, they would serve as entrance points for sound waves from the outside.
The advantages of cellulose blow-in insulation are numerous. It is a relatively economical method for soundproofing walls.
Many homeowners can also install it by renting the equipment from a nearby home improvement retailer like The Home Depot.
Furthermore, cellulose contains more recycled material than any commercially available acoustic insulation, making it a “green” insulator.
Numerous variations of blow-in insulation are offered. There are options for loose, wet, and dense packs.
Fiberglass is another typical insulation material. Its benefit is that once blown into the walls, it instantly dries.
2. Seal the Outlets and Cracks
Any potential places of entry on a surface that sound waves can squeeze through will be aimed.
The caulking around your windows, any holes or cracks in your walls, or even the dead air space around your outlets are all potential sound leaks.
We can drastically minimize the quantity of outside noise that seeps in by sealing off all these entryways.
Your first step should be to use an acoustic caulk on every window and wall corner. Be thorough, as this will cover all four corners of each soundproof wall.
Use acoustic caulk rather than the common latex caulk you may get at your neighborhood hardware shop.
It will be harder for sound waves to pass through the soundproof walls because this acoustical sealant makes walls more airtight.
It will effectively reduce noise when used with the other different methods we’ll cover later.
Install a straightforward wall plate insulation gasket, a foam that fits around switches and outlets to close off the open space around the outlets and switches.
Your walls will be more airtight once the gaps are closed, making it harder for soundwaves to pass through the walls. As a result, your noise problem should be greatly decreased.
3. Using Green Glue, Install a Further Layer of Drywall
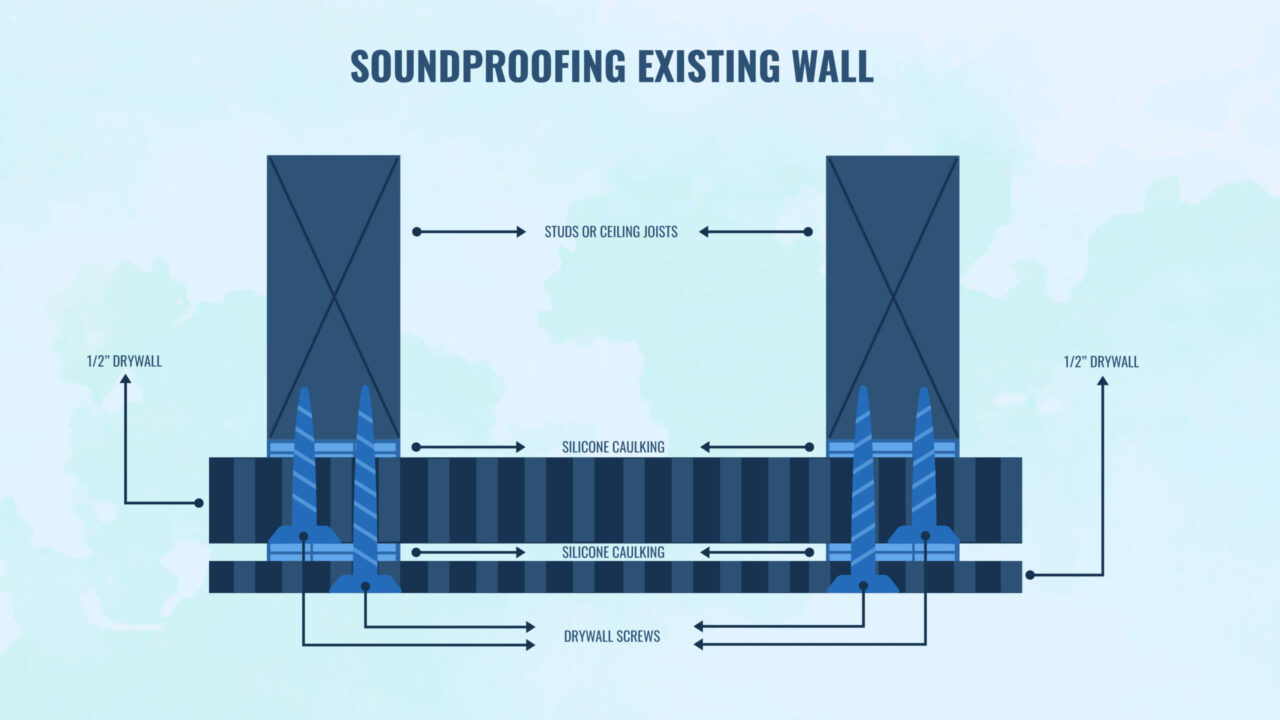
Even though you might want to soundproof walls without removing drywall, you might be able to add more drywall to the walls to increase sound insulation.
One simplest method is adding more drywall on top of the current wall. The top of your current wall is covered with sheetrock screwed down.
The main wall will be separated by a second drywall layer, allowing sound to bounce off the new drywall before striking the main interior wall.
Choose 5/8″ drywall if you can because it will prevent more sound. However, adding mass alone won’t give you the desired sound-reduction effects.
We’re going to sandwich a layer of Green Glue noise-proofing compound between our layers of drywall to obtain more pronounced soundproofing.
Soundproofing your existing interior walls is simple and inexpensive with green glue. It is a liquid that is simple to apply and is available in a tube or bucket.

Green Glue produces a dampening layer between your sheetrock for blocking noise that absorbs and dissipates sound vibrations properly.
Before screwing your new drywall to your wall, apply Green Glue on the back. After that, you can complete the drywall as usual. Finish off using acoustic caulk to seal the wall’s edges.
Then, seal the outlets and switches to ensure that your wall is entirely soundproofed against outside noise.
4. Use QuietRock
This technique follows the same steps in execution as method 3. The choice of products is the key distinction in this case.
In the final method, we increased the thickness of our current wall by adding another drywall layer. In this case, we’ll substitute a layer of QuietRock.
Not familiar with QuietRock? It’s a relatively new unique variety of drywall made specifically for acoustics.
Four sheets of standard drywall cannot reduce noise as well as one sheet of QuietRock does! QuietRock panels are put the same way as ordinary drywall because they function similarly.
You may significantly minimize the amount of noise that gets through by screwing your QuietRock sheet on top of your current drywall.
Apply the Green Glue Noiseproofing Compound between drywall layers to reduce noise as much as possible.
Just give the QuietRock’s back a touch of soundproofing paint before binding it to an existing wall. As noted in soundproofing method 2, seal the corners and electrical outlets.
5. Resilient Clips & Channels Used to Decouple the Second Layer of Drywall
As we previously discussed, adding drywall to an existing wall will make it heavier and less likely to transmit sound.
However, we also know that soundproofing our internal walls alone is insufficient.
Most impact noises can be eliminated, and airborne noise can be significantly reduced by decoupling our new drywall layer from the original wall.
The rubber backs of the robust clips will aid in decoupling them from the wall to which they are fastened.
By drilling screws through your existing drywall and into the studs behind, you may install the clips to your existing wall.
The resilient channels will be attached to the clips and positioned horizontally. Then, you will screw directly into the grooves to attach your second drywall layer.
Unfortunately, robust clips and channels lose effectiveness when installed on existing drywall.
However, this may be fixed by installing some R-6 insulation after the resilient channels are set up but before the drywall is put up.
For simple drywall installation, the channels will hold the insulation in place.
Although this is one of the best methods for soundproofing existing walls, it is important to note that it is rather expensive.
The greatest labor is also required because you will be removing drywall to install the hardware. But it’s something to think about if you’re serious about soundproofing a space.
6. Increase Mass Loaded Vinyl
A soundproofing material known as mass loaded vinyl (MLV) is available in thin, rolled sheets.
Metal particles are incorporated into it to increase density and provide soundproofing properties.
Mass loaded vinyl can dampen the entire wall by being put in between two layers of drywall to reduce the vibrations between them. It will aid in absorbing and dissipating outside noise.
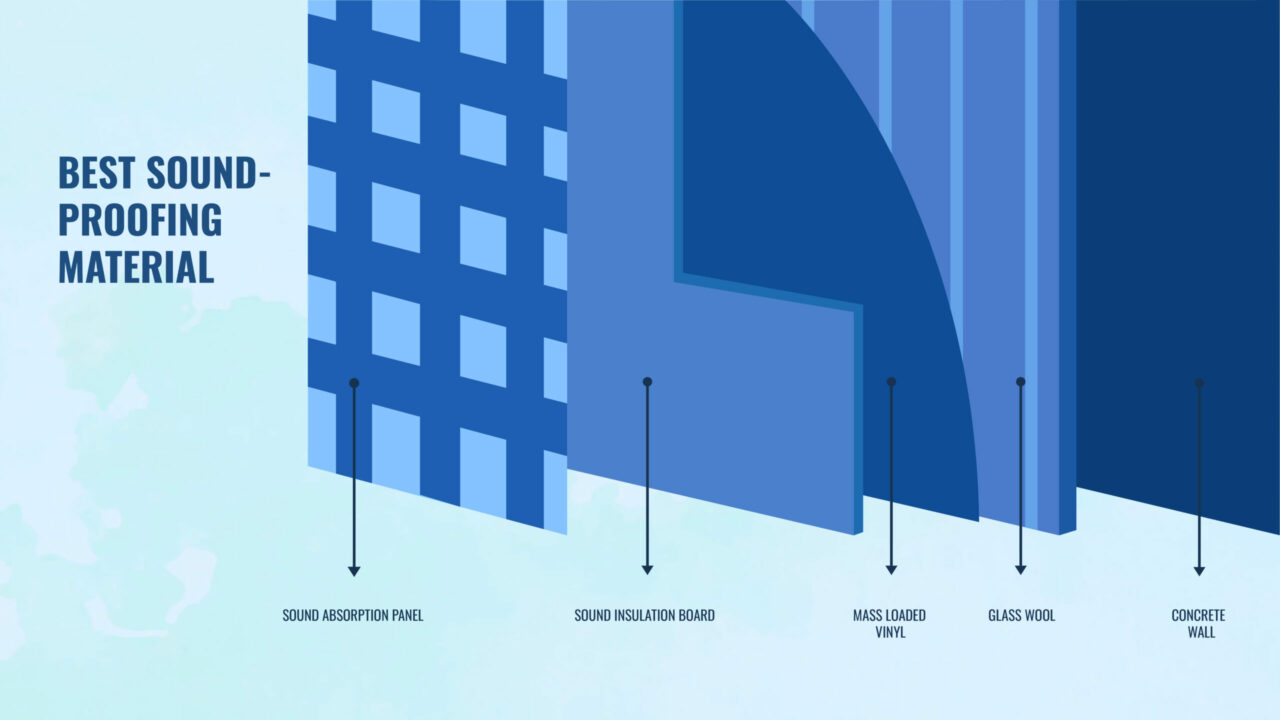
How is mass loaded vinyl installed? MLV can be immediately fastened to your drywall.
Each piece’s seams should overlap by 2″ and be taped over. Cut snugly and carefully around switches and outlets.
There won’t be a need for outlet insulation gaskets because the mass loaded vinyl would close off these cracks where sound can enter.
It’s time to add your additional layer of drywall after it has been laid over your existing drywall.
For maximum soundproofing, you can use conventional drywall or the QuietRock acoustic sheetrock we stated in technique 4.
Just go through the first layer of drywall and screw your new one into the studs.
Installing resilient clips and channels will also effectively stop all sound from entering your existing walls. These would be fixed to the MLV’s top.
The QuietRock would then be hung on the durable channel, and all edges would be sealed with acoustic caulk.
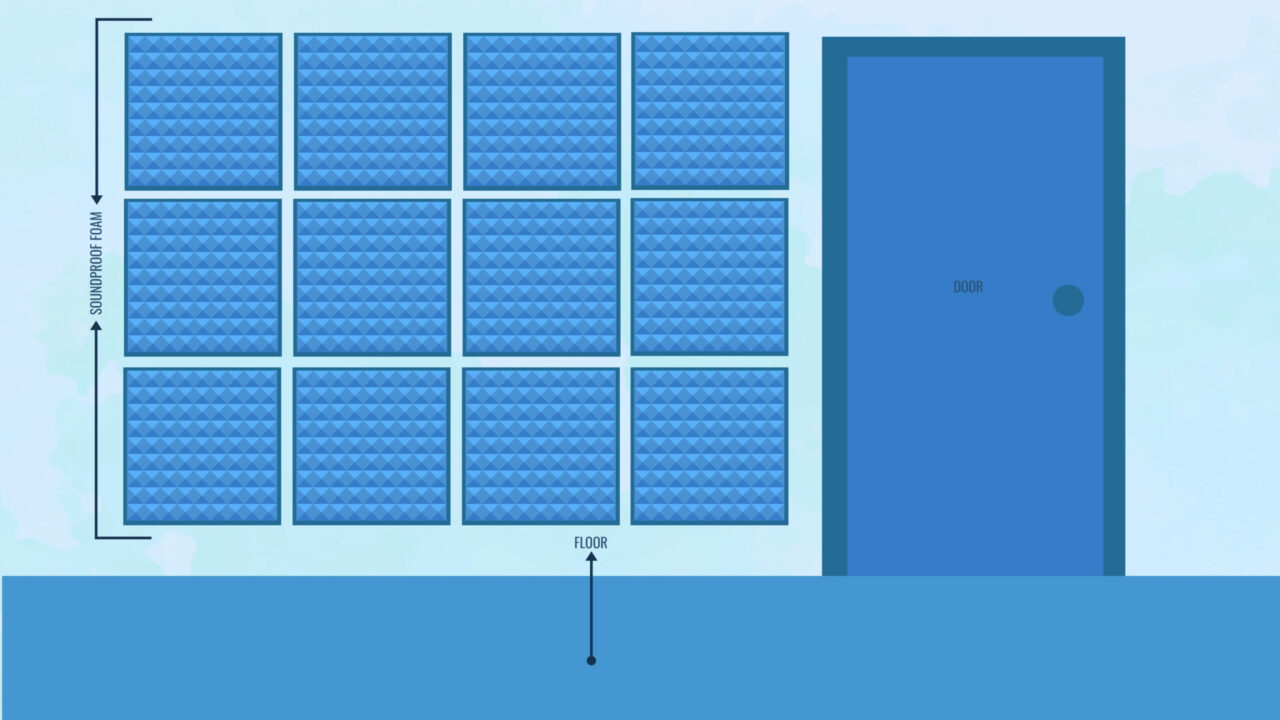
7. Install Acoustic Foam Panels
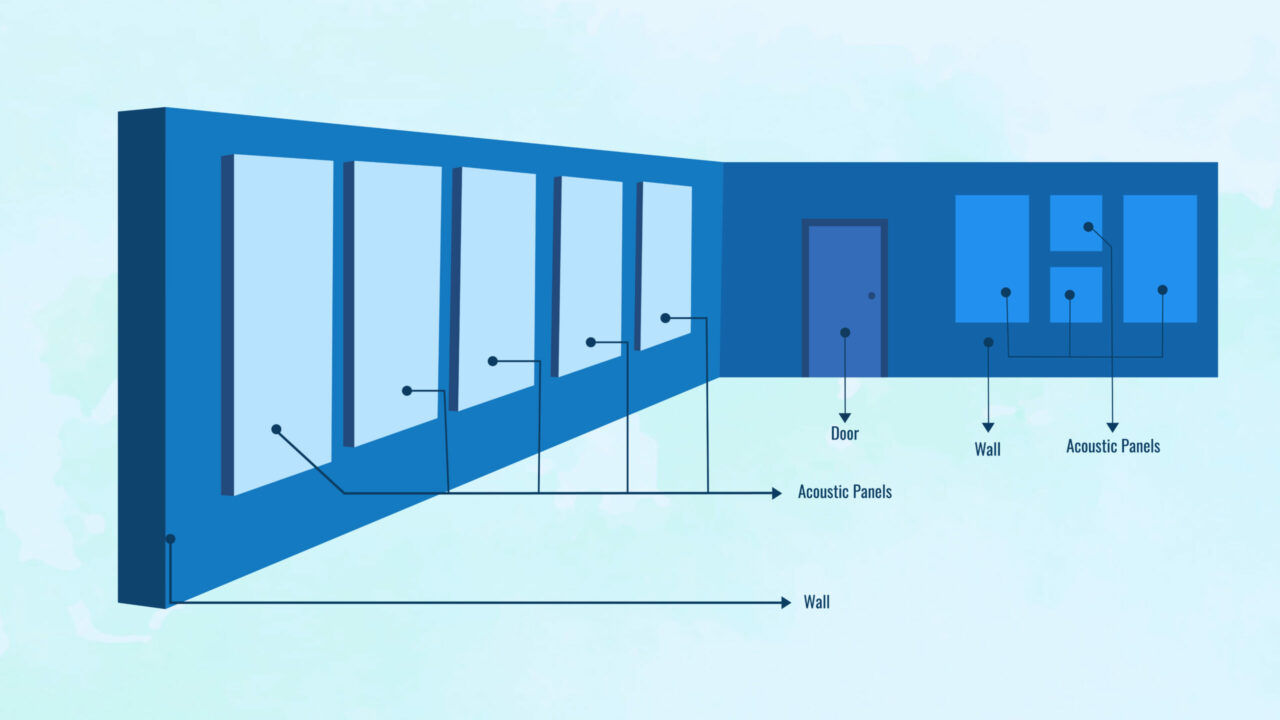
Acoustic foam panels are made to smother and cancel out sound waves. They simultaneously improve the sound in the space in which they are put.
Acoustic foam panels come in various sizes, shapes, colors, and textures. They work as a thermal insulators and an absorber of sound waves since they convert into heat.
They are utilized in recording studios worldwide to absorb sound and create pristine recording conditions since they are so effective at doing this.
In your home, they can provide the same function. Depending on how much noise you need to absorb, these acoustic foam panels are available in thicknesses ranging from 1″ to 4″.
They also come in several colors for aesthetic reasons, so you may choose one to use your existing color scheme.
To install acoustic foam panels is simple. The straightforward installation of these acoustic panels uses a unique adhesive spray created for the purpose.
You can either nail foam panels to the walls to tack them in place or, for stronger soundproofing, apply Green Glue on the back of the panels to glue them to the walls.
There won’t be any mess, no special equipment is required, and it only takes a few minutes.
These panels will not only stop sound from entering through your walls, but they will also improve the acoustics of your room, making it sound even better.
It is especially helpful if the room you’re seeking to soundproof also houses a TV because it would benefit greatly from the increased sound the acoustic foam tiles provide.
Try hanging the panels in various configurations to enhance their aesthetic attractiveness; for instance, you may alternate their vertical and horizontal placement.
8. Hang Acoustic Fabric Panels
Acoustic fabric panels are a terrific method to reduce outside noise while adding aesthetic appeal to your space. They are available in various hues to match your decor’s color scheme.
They also significantly enhance the acoustics in your room by absorbing echoes and reverberations.
It improves the audio quality of conversations, music, and even movies. These are employed for this purpose in professional applications.
Acoustic panels with an NRC value of 1 out of 1 provide the best sound absorption.
They are simple to hang and may be arranged in various ways, which will aid in keeping the interior of your house quiet.
It is one of the simplest methods of soundproofing your existing walls, and it won’t leave lasting damage if you have to move out again.
9. Make Use of Soundproof Blankets
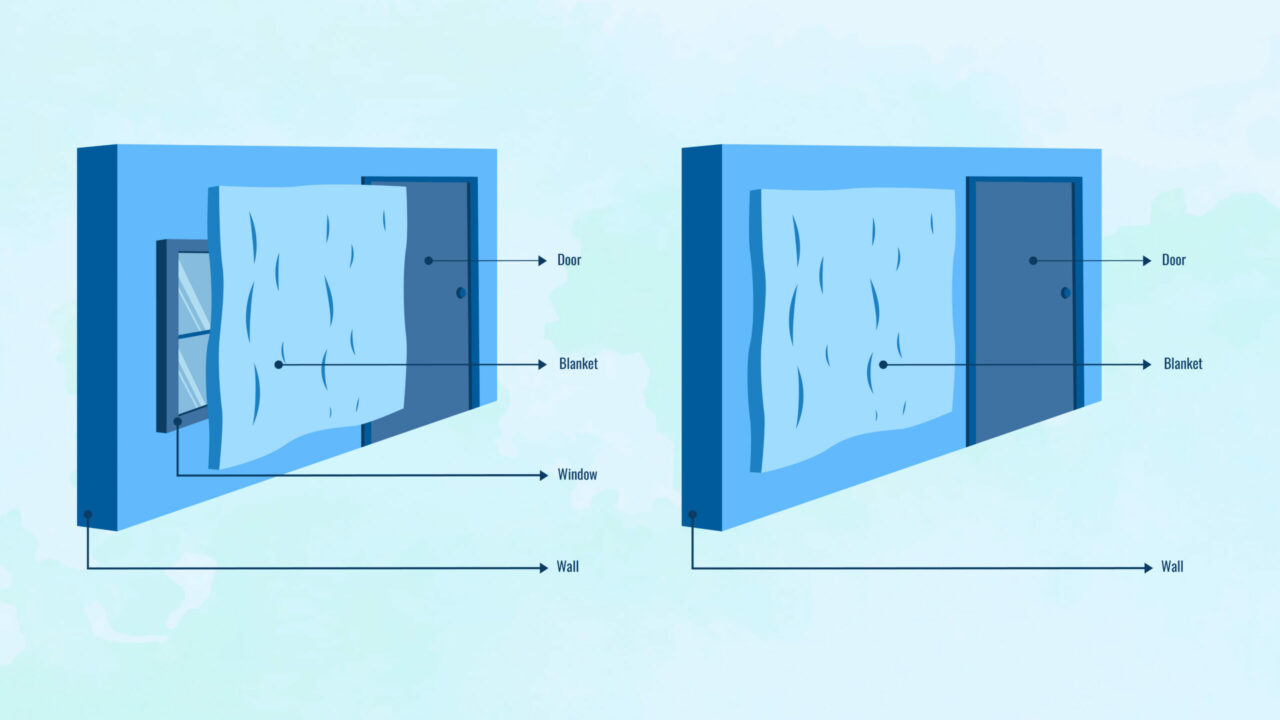
You might be able to use some straightforward and reasonably priced soundproofing moving blankets to lessen the noise if it is not too loud.
Like the acoustic fabric panels stated in technique 8, these are extremely thick, soundproof blankets that absorb sound more than they reflect.
Since they are absorbent, soundproofing blankets have the added benefit of enhancing the acoustics in your room.
These blankets can give your room a beautiful dry sound that makes everything sound much more crisp and clear by decreasing the flutter echoes and reverberations.
Nailing, screwing, or even using thumbtacks can be used to hang soundproofing blankets.
Since they are machine washable, you won’t have to be concerned if you need to move them about.
Even if it isn’t the best solution, hanging soundproof blankets is less disruptive and far simpler than decoupling your walls.
10. Put Up Soundproof Curtains
A very enticing option for reducing outside noise pollution without causing any harm to your house is soundproof drapes. They are affordable and simple for any homeowner to hang.
They also come in various lovely color choices for your existing decor.
Standard curtain rods, which can be mounted to the ceiling or walls, hang the soundproof curtains.
One of the main advantages of these soundproof curtains is the ability to install as many as you need to cover a room of any size without significantly increasing labor or time.
You can slide them out of the way when you are not using them.
These are particularly helpful for concealing windows, frequently used as points of entrance for sound waves from the outside.
It will be aesthetically pleasing to use them to increase the sound in your home, whether you use them as windows or as a room divider to divide one room into two.
11. Cover Walls With Sound Absorbing Fabrics
Consider using sound-absorbing materials to cover your walls if soundproof curtains and soundproofing blankets don’t appear to be your thing.
The track system that runs the length of your wall is where these materials are mounted. PVC or metal can be used to make the tack systems.
Without a seam, sound-absorbing fabrics can be delivered in lengths of up to 100 yards. It implies that you can have a solid, seamless wall covered in a lovely acoustic fabric.
You can select any print, color, or pattern that fits your style for entirely original and customized interior walls that sound as good as they look.
Sound-absorbing fabrics might be the only accessible option if you’re looking for a unique approach to block out the outside world.
12. Create a New Wall in Front of the Current One
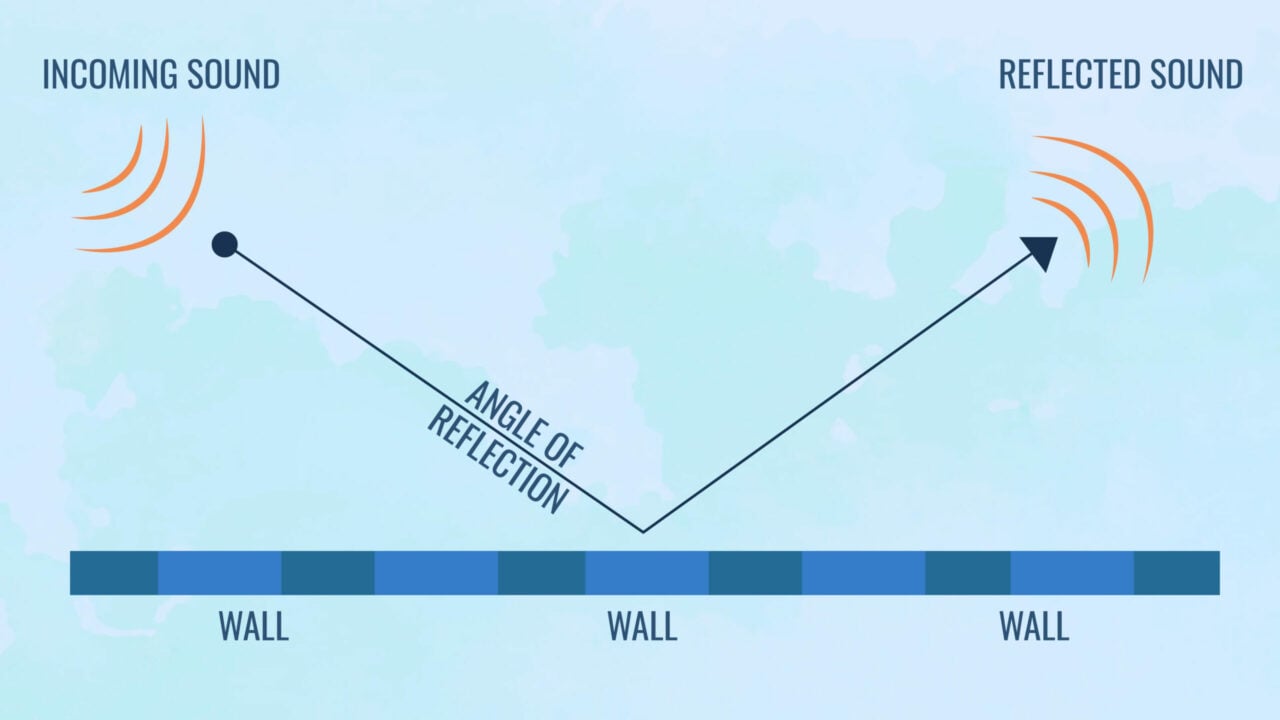
If you have the space, one of the best ways to soundproof walls is to construct new ones inside the old ones.
These walls will not be joined to the existing walls in any way, making them entirely independent. They won’t transmit noises from the original wall as a result.
Instead of the first wall, your second wall will be fastened to the floor and the ceiling. Starting with framing your new soundproof wall, you can apply acoustic insulation to absorb sound.
The next step is to attach MLV to the studs over the wall’s frame. Be sure to cover the area from floor to ceiling, but the MLV must stay away from both.
After installing your MLV, you can use screws to secure the robust clips to the studs. The robust channels can then be attached to the clips.
You can install 5/8″ drywall after setting up your robust clips and channel.
In this case, drywall is preferable to QuietRock since it offers little soundproofing benefits compared to robust channels alone or QuietRock alone.
Use acoustic caulk to seal all edges and corners after finishing the drywall installation.
Install the insulation gaskets for the switch and outlets to ensure no points of entry for errant soundwaves.
You can put acoustic fabric panels from method 8 on this list on your new soundproof wall for maximum efficacy and to adjust the acoustics in the space.
13. Soundproof Paint Should Be Used on the Walls
Soundproof paint can be a solution for you to consider if you’re seeking a strategy to reduce noise from the outside world while giving your house a new coat of paint.
Similar to regular paint, this extremely thick soundproofing paint is simple to apply. However, by helping to muffle outside noises, sound-dampening paint will also make your house quieter.
However, this won’t be a complete answer. Consider using one of our more powerful options, such as adding QuietRock or MLV, if you need to reduce loud external noise.
Applying additional layers will increase the effectiveness of this soundproof paint. The effects of the soundproof paint will be more noticeable the more layers you may apply.
14. Take Advantage of Decor
Sound waves have plenty of room in space to move about and use up energy, giving the impression that they are louder than they are.
You should be able to significantly reduce the noise that enters through your thin walls by employing the furniture and other items in your house.
You want to position your heaviest, toughest, and largest furniture around the room’s perimeter. Dressers, armoires, and similar items go here.
The most effective way to deflect incoming sound waves and prevent them from entering the room is with these objects.
Be careful not to let anything touch the wall when positioning your bulky furniture around the room’s outside border.
If that happened, vibrations would be easily transmitted from the wall to the piece of furniture, possibly amplifying the original sound. Not the outcome we want in this case!
It’s time to use the softer furniture to absorb the loose waves that pass through our initial sound barrier once the hard and heavy furniture has been distributed across the room.
Any mild additions you can make would aid in noise reduction. Anything soft, including pillows, blankets, drapes, and couches, is nice.
What You Should Know About Soundproofing Older Walls
You must first understand sound before experimenting with various soundproofing techniques. Impact and airborne noise are the two different types of sound.
Soundproofing existing walls is an important step in soundproofing a room.
Different techniques are needed to limit the transfer of different types of sound since they all transfer sound differently.
As a result, you must identify the type of sound you are dealing with to select the appropriate soundproofing methods.
- Airborne Sounds: As the name implies, airborne sounds travel through the air. Soundwaves are produced when something generates an airborne sound. These waves are caught in the air and move there until they run against a solid object, like one of your walls.
Due to the vibration caused by the impact, sound waves from the adjacent room can be heard through your walls and can be heard as people talking, TV noise, or music blaring. - Structure Borne Noise: Impact noise, also known as structure-borne noise, is created when anything collides with a structure.
The structure serves as the medium through which soundwaves are conveyed, not the air; in your instance, the walls are the structure through which soundwaves are sent.
Footsteps that travel through the floor and ceiling above you, knock on doors, and bashing on walls are all examples of impact noise.
Identifying the Type of Sound
Consider the noise that is bugging you in the first place before beginning any soundproofing projects.
Put your palm exactly where the sound comes from to identify the type of sound bouncing off the walls.
A vibration indicates an impact-based noise. It is an airborne sound if there is no vibration, but you can still hear the noise.
Two instances of impact noise are knocks on the door or bangs on the wall.
It is known as airborne sound when your next-door neighbor’s TV, voice, or music can be heard through your walls.
It is important to consider existing walls when soundproofing a room for music and other noises as they act differently and could affect your sound.
Some Tips to Remember When Soundproofing Walls
It’s crucial to remember that noise can enter your home through other openings while soundproofing your internal walls.
The weak point will be found by sound waves entering. Any area of your exterior where sound can enter will attract the noise and annoy there.
Don’t overlook some additional crucial areas to soundproof if you want to keep your house quiet inside.
The main source of noise leakage is doors. Particularly hollow-cored interior doors allow for a lot of sound transmissions. Noise pollution can frequently come from even external doors.
You can significantly improve by installing soundproof doors in place of standard ones.
The ceiling is also where a lot of noise can seep into your home. It is important to consider existing walls when soundproofing a ceiling.
You can hang acoustic panels on your ceiling or even build a drop ceiling to reduce the noise.
Principles to Use When Soundproofing Existing Walls
It’s crucial to comprehend how soundproofing functions before attempting various soundproofing techniques.
You’ll be better equipped to employ these soundproofing measures if you know the procedures to prevent sound from transferring.
- Mass: The sound transmission occurs via vibrations. A sound wave must cause movement on a hard surface for the sound to travel through it. Larger, heavier objects are more difficult to move than smaller ones. An object will become heavier and larger as its overall material content increases. As a result, the energy of a soundwave will have a harder time passing through the surface. In essence, you are increasing the amount of solid material between the sound source and the area where you want to remain silent. Brick walls usually provide lots of mass to deaden sound.
- Sound Absorption: Some substances can absorb soundwave energy and neutralize it. Your home’s walls’ fiberglass insulation serves as a wonderful illustration of how to reduce noise through sound absorption. Higher frequencies are excellent for sound absorption. Lower frequencies have a lot more energy. Thus more absorbent material will be needed to kill the wave’s momentum and prevent it from transferring.
- Mechanical Decoupling: The sound is transmitted through vibration, as we’ve already established. Decoupling the surfaces is one of the best strategies to reduce sound transfer. Two surfaces in contact make it easier for vibrations to flow through. You may significantly minimize the energy that can travel through by removing contact points and adding rubber decouplers where surfaces touch.
- Sound Blocking: Any hefty or thick object you mount on your wall can effectively muffle sounds. Noise reduction requires adding mass, and drywall is one of the cheapest sources of mass. If you use two layers, your wall won’t vibrate.
- Damping: You can hear ringing when you tap a glass with a fork. The ringing will end when you tap it with your finger. The damping effect is what is known as this. Viscoelastic adhesive-based waterborne damping compounds work well as soundproofing materials. If you’re interested in learning more, scroll down to the section on employing a damping compound to stop sound waves from traveling through a wall.
Which Principles Should You Apply?
Although any of the five soundproofing strategies I’ve discussed can be used alone to reduce sound transmission, all five will yield the best results.
For instance, your soundproofing attempt will be ineffective if you apply a lot of bulk to your walls but don’t employ damping.
To help limit noise transmission, you should cover the entire wall. Controlling noise is similar to controlling heat in certain ways.
Even the slightest spaces will allow noise to get through, so be sure to caulk them with acoustical caulk.
Frequently Asked Questions (FAQs)
If you can’t find the information you’re looking for, below are some of the most often-asked questions about how to soundproof walls and some related questions.
How Can I Soundproof an Existing Wall Cheaply?
Using heavy blankets and quilts is the least expensive method of wall soundproofing.
Put blankets over the walls, doors, or windows, depending on where is the noise coming from, to muffle outside sounds.
Hang blankets within the walls or on either side of the doors to block out noise.
Can You Soundproof a Room Without Damaging Walls?
It’s quite dense and does a superb job of obscuring gaps where sounds can leak.
One of the best ways to soundproof without damaging walls is to sandwich mass loaded vinyl between your layers of acoustic drywall.
Does Soundproof Wallpaper Reduce Noise?
Acoustical wallpaper is not intended to minimize noise; hence it cannot do so. It is designed to manage a space’s acoustics, including echo and reverberation.
Therefore, while it can improve acoustics, it won’t soundproof a place. Its average NRC rating is 0.4, which indicates that it absorbs about 40% of noise.
Can I Soundproof My Wall With Acoustic Tiles?
Yes, you can. However, acoustic wall tiles are made to control acoustics, not insulate a wall. They are made of open cells, which trap sound waves and prevent them from bouncing.
It indicates that they focus on reverberation and echo rather than minimizing sound transfer.
How Much Does a Soundproof Wall Cost?
It depends on the size of the room (square foot). You can expect to pay between $10 and $30 per square foot for soundproofing a room.
Conclusion
We’ve discussed a wide range of options for you to stop the noise from entering your house. These cheap wall soundproofing strategies aim to reduce both impact and airborne noises.
Using these soundproofing techniques, you may execute soundproofing walls without removing drywall.
Installing resilient clips and channels with a second layer of acoustic drywall on top will be the most efficient technique.
When these techniques are used together, you will notice a significant improvement in the noise level entering your home.
I hope these few pointers will enable you to make peace with your neighbor or have a better night’s sleep.


