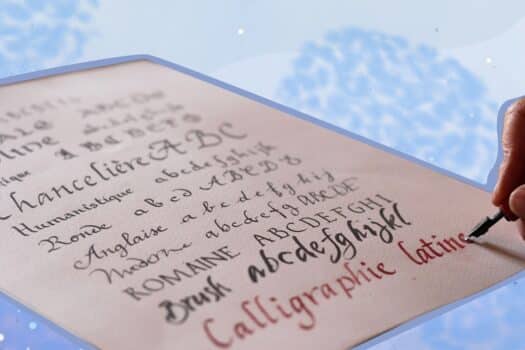
Calligraphy pens have been around for the longest time, and they can be used with different kinds of ink to produce detailed art or writing. The user can apply various amounts of pressure on the pen to control the width of the lines.
Calligraphy pens are inking pens that go by various names from fountain pens to dip pens. These pens are specifically crafted for enabling you to write beautiful calligraphy.
And although the work may seem complicated and hard to learn, it is pretty easy. All you need to know is how to use the pens correctly. In this guide, we offer detailed instructions on how you can use your ink pens efficiently and a general idea of the types of ink pens available on the market.
Things You Will Need

As appealing as they may seem, calligraphy pens do need precision and craftsmanship to get a hang of. It’s not impossible though. You just need the right method to use them and we’ve got your back on that.
Here are some important materials you should know of before you start using a calligraphy pen.
1. Basic Materials
When you are a beginner, you do not need advanced tools to be able to use a dip pen. You just need the right materials, such as:
A. Nibs
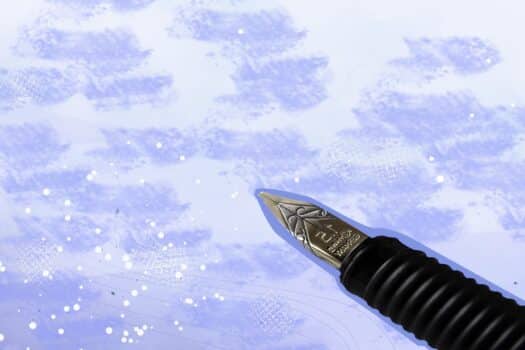
The most important part of your dip pen is the nib, which is what will enable you to draw or write with it. So, you must find a nib that suits your needs as well as fits your dip pen perfectly. You can differentiate the nibs by their overall size and shape.
Here are few more point to be kept in mind when selecting a nib:
- Elasticity
One important factor that can help you identify good dip pen nibs is elasticity. Elasticity simply means the flexibility of the tip. The more the flexibility, the less pressure you would need to use to shift between thinner and thicker lines.
If you’re a light handed writer, something with high elasticity would be ideal as it does not require too much pressure. Similarly, if you are a heavy handed writer, lower elasticity would be easier to work with.
- Size
Most conventional dip pen nibs come in fine or ultra fine sizes. These allow you to have more control over the lines and are usually thinner. If you write or draw on a large scale, then broader nibs would be better.
- Shape
Similar to the size of the nib, the shape also tends to play a major role in how your artwork will turn out. If the nibs are more narrow, you’ll get finer lines, and if the nib is wide at the tip, it will produce broader lines.
B. Holders
Next comes picking out the best nib holder, which makes up the body of the pen. So, you have to make sure that your nib is compatible with the holder.
There are two types of holders- straight and oblique. Straight pen holders line up straight when a nib is attached and oblique pen holders usually have a slight protruding from where the nib is attached to the pen’s body.
This protrusion forces the user to use the nib at a more natural angle, which may be hard for a beginner to do. Hence, a straight nib holder is the most beginner friendly dip pen holder. Once the straight pen holder is mastered, then a progression to oblique holders can be made.
C. Ink
As the name “dip pen” suggests, there should be something to dip the pen into. And this is where ink comes into play. Any kind of ink would work with most dip pens, but the most common types of ink used are India ink and acrylic ink.
- India Ink
India ink is the most used ink on the market. It is easily available and a beginner friendly choice for good quality black ink that suits various purposes from writing to drawing. Moreover, it is waterproof, so you don’t have to worry about that one drop of water ruining your work.
- Acrylic Ink
Acrylic inks fall right under india ink and are great for artists. They are also water resistant and are available very easily
- Sumi Ink
Sumi ink shares many similarities with india ink but they dry down matte as opposed to india inks’ glossy finish. However, these inks are not as easy to find and take a while to spot.
- Calligraphy Ink
Calligraphy ink is popularly used for calligraphy. They come in different colors but they are much thinner in consistency as compared to other inks. That’s why thicker paper should be used with calligraphy ink so as to avoid blotting or running.
D. Paper
If you’re planning on learning calligraphy, it is important to invest in good quality paper. Otherwise, applying too much pressure or using thinner consistency ink may cause the paper to tear or blot.
There are specific papers made for calligraphy that you can easily find out there. Or, you can choose any kind of paper that is thicker than 70 GSM to ensure that your work ends up looking clean and crisp.
How To Use Calligraphy Pens?

1. Dip The Pen
The most common mistake that people make with calligraphy pens is dipping the nib in ink way more than it needs to be. However, you should be ideally dipping the dip pen nib till its reservoir, which is the tiny hole on its flat surface. Stop dipping the nip once the ink touches the reservoir.
If you dip the nib more than needed, it will cause the ink to spill all over your hands or worse, your paper.
2. Remove Excess Ink
Once you dip your pen, there can be a few drops of ink spilling out of the nib. But you can avoid this by holding the pen over the ink bottle for a few minutes. This enables all the excess ink to flow out and leaves the right amount of ink in the ink reservoir.
Try not to shake your pen to drop the ink, as it may result in the ink spilling all over the place.
3. Hold The Dip Pen Properly
Although it may seem complicated, holding a calligraphy dip pen is pretty easy. If you hold it like you would a pencil, half the struggle is complete. The rest depends on the amount of pressure you use with the pen.
Keep in mind that your fingers must always remain relaxed and the shift of pressure must be from your arms. Some dip pen holders have grooves that help it lay comfortably in your hands.
You must also hold the pen at a 45-degree angle at all times. Since it is an ink pen, holding it vertically would not allow the ink to flow to the nib smoothly. Hence, it is important to hold the dip pen correctly at the correct angle.
5. Draw On Scrap Paper
Before using a dip pen on the actual piece of paper you’re going to work with, it is better to use a scrap paper for practice. You can draw lines to ensure that the ink flow is to your liking. Besides, you can practice different pressure lines so as to be able to start your work confidently. Keep experimenting till you’re satisfied with the lines and the ink flow.
6. Dip The Pen Again
Since an ink pen reservoir can only hold a certain amount of ink, prolonged usage will result in the pen running out of ink and your lines being patchy. Hence, it is important to dip the pen frequently to get clean lines throughout the page.
The amount of ink needed also depends on the size of the nib. Thinner nibs will often hold ink up to a full sentence while the broader nibs will require redipping after every word.
7. Clean The Dip Pen
Aftercare is just as important for your pen as is using it correctly.
Once you’re done using the pen, dip the nib in a bowl of warm water to help remove the excess ink from the ink reservoir. After this, you can wipe it dry gently with a soft paper towel.
These steps are important because failing to do so will cause the ink to dry in the reservoir and end up shortening the longevity and quality of the pen.
Drying is also essential as it may cause the metal nib to rust if the water is not removed. You can always keep a bowl of warm water beside you to clean the pen immediately after use. This also works well if you tend to use multiple colors of ink.
Keep in mind to rest the pen upwards after cleaning it. This prevents the pressure from being applied directly on the nib and saves it from being damaged.
How To Put Ink In Different Calligraphy Pens
Like most art supplies, calligraphy pens come in various shapes and sizes meant for different purposes. And different pens have ways of being filled with ink.
Some use ink cartridges, some have reservoirs, and some don’t use any ink container within the pens barrel. So, let us take a look at how each dip pen is meant to be filled.
A. Pens With Piston Filler Ink Reservoir
These pens are the easiest to fill and the most economically feasible ones on the market. All you have to do is dip the nib into an ink bottle. Once the nib is in the ink, rotate the knob at the end of the pen. This will pull the ink inside the ink barrel of the dip pen.
Once you’ve filled it with the required ink, pull the pen out and wipe the nib gently with a soft cloth or tissue paper to remove excess ink. Make sure to use a firm tissue paper, as the thinner ones may get stuck to the tip of the pen.
B. Pens With Ink Cartridges
If you hate the possibility of spilling ink when filling a dip pen and appreciate a more cleaner pen, ink cartridge pens are for you. These are very easy to use and avoid the hassle of cleaning up spilled ink.
However, these may take longer to saturate the nib. So, if you would like to start with your work instantly after filling, this pen may not be a good choice.
To change the cartridge, all you have to do is pull the old cartridge out and push the new one in. It does require some amount of force to push the cartridge in place due to the ball stopper, so don’t worry about breaking your pen. Push it till you hear a click and your cartridge is secure.
C. Pens With Converters
Ink converters are just like piston filler pens, expect these are a separate attachment that you need to attach to your dip pens. Ink converters, however, are heavily based on size. So, not every converter will go with every pen.
Once you’ve found a converter that fits your pen, dip the nib in ink and rotate the knob on the converter. Remember to prep the converter before you draw in ink by rotating the knob in the opposite direction to release all air. Once you’ve filled the pen with ink, you can close the barrel and start creating art.
Apart from piston converters, there are squeeze converters. They follow the same mechanism except instead of twisting a knob, these converters are to be squeezed. When you squeeze initially, you will see air bubbles form in the ink bottle. Keep squeezing till the air bubbles disappear. Once this happens, you will know that the pen is full.
The Best Pen For Calligraphy
ballpoint pen vs gel pen– which is better for calligraphy? This is one of the most popular questions.
As convenient and easy a gel pen can be, it is not the traditional choice for calligraphy. The effort one puts in to learn calligraphy and use ink pens usually show in their work. And calligraphy that is done with ink pens tends to be more professional in terms of looks.
Gel pens, on the other hand, may be easy to learn and use but will never provide a good quality finished product like ink pens do. This is why most professional calligraphers stick to using ink pens for their work.
How Do Invisible Ink Pens Work?
We bet you’ve already heard of invisible ink pens. But have you ever wondered “how do invisible pens work?” If yes, then continue reading!
Most basic invisible ink pens use the mechanism of heat activation. The ink is usually made from various organic materials that dry down invisible. Once you expose the paper to any kind of heat, the acids in the ink turn a different color, making the writing appear and readable.
Another type of invisible ink requires the writer to use a certain chemical to write the message. Likewise, the reader has to use a different kind of chemical that will activate the first chemical. The reaction between the chemicals render a color to the ink, thus making it readable.

How To Use A Calligraphy Pen With Ink Conclusion
If you have been meaning to try out calligraphy, this is your sign to do so! It is a very relaxing art form and you would enjoy it thoroughly. But don’t forget to keep these tips in mind when starting out with your calligraphy journey.
On that note, we will now say goodbye. If you found this article insightful, check out our other article on “how to read a thermal imaging camera?” to learn about the world of thermal imaging.
See you again!


