Keeping your plastic sink spotlessly clean is extremely tiring and cumbersome. But it’s not impossible!
Believe it or not, this can be done using inexpensive household ingredients and other cleaning agents lying around your home. However, not many know this.
As a result, they tend to use toxic and heavy acidic cleansers for cleaning their plastic sink. This, in turn, causes damage instead of stain removal.
We understand your plight. That’s why we bring you this informative guide that will help you learn how to clean a plastic sink. We’ve included three cleaning techniques along with each of their step-by-step guides.
So, without further ado, let’s dive in!
Methods to Clean a Plastic Sink

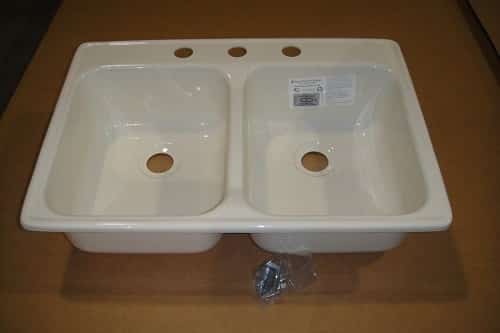
Plastic or acrylic sinks are usually white or off-white in color, which makes them more susceptible to stains. Moreover, they are primarily used for cleaning off paints and industrial materials. So, you’ll definitely be tackling hard-to-remove stains.
Although acrylic is a durable material, it’s not as robust and durable as porcelain or stainless steel. As a result, heavy acidic cleansers further damage the surface of the sink by burning holes.
Therefore, it’s challenging to find an ideal cleanser that will enable you to clean and effectively remove stains from your basin. This is why we’ve come forward with a few easy methods to help you clean your plastic sink.
Most of these steps and techniques involve household ingredients, so you need not worry about damage. Let’s get going then!
-
Vinegar and Baking Soda
For those who don’t know, vinegar comes with natural antibacterial and cleansing properties, while baking soda is a popular alkalizing cleansing agent. Hence, when mixed together, they create a frizzy and bubbling cleansing foam.
On application, the solution reacts with stains on the surface, thereby breaking their bonds. This, in turn, loosens the stains from the surface, making it easy for you to scrub them away. On that note, let’s take a look at the steps involved in cleaning the sink with these ingredients.
Step 1. Sprinkle Baking Soda On Sink
First things first, make sure that your sink is completely dry. Now, plug it, and then sprinkle a thick layer of baking soda on its sides and bottom.
Step 2. Pouring Vinegar
Next up, start pouring vinegar into the sink. Using a wet sponge, wipe down the sides and bottom surface, making sure that the vinegar gets mixed with the baking soda.
After this is done, you’ll notice that the solution converts into foam. You can now leave the mixture in the sink for around 30 minutes to an hour.
Step 3. Draining and Rinsing
After allowing the mixture to sit for the specified duration, pull out the stopper, and let the sink drain. Now, use hot water to wash away any residue. Once rinsed, wipe down the surface of the sink using liquid detergent and a sponge, and rinse again. This will help you get rid of stains with ease.

-
Chemical Scrubs
In case your sink is not completely clean, even after applying the vinegar and baking soda mixture, opt for a more powerful cleanser. That being said, chemical scrubs containing oxalic acid, calcium carbonate, or bleach can remove stains effectively with a little bit of effort from your end.
Bar Keepers Friend is a popular choice when it comes to abrasive cleansers. It comes with a consistency similar to baking soda. Plus, it contains oxalic acid, which helps in breaking the bonds between stains, thereby clearing them from the surface with ease.
We’ll be taking the example of this cleanser in order to provide step-by-step instructions on how to use it. Read on…
Step 1. Read the Label Before Applying The Cleanser
Always make sure that you check the instructions provided on the label before applying the cleaning agent. This is a crucial precautionary measure for your safety.
You may begin sprinkling the powdered cleanser on the dry sink, in this case, Bar Keepers Friend. Now, with the help of water, create a paste, and allow it to sit on the surface for around 30 minutes.
Step 2. Continuous Scrubbing
Once the specified duration is up, use a non-abrasive sponge or rag to scrub the surface in a circular motion. The stains should be lifted away with ease. Continue with the scrubbing process until your plastic sink is spotless.
Step 3. Rinsing and Drying
Rinse your sink with hot water and then allow it to dry for a thorough clean.
Step 4. Seal The Surface
After the entire cleaning process is complete, apply an acrylic cleaner such as Gel-Gloss using a cloth. This will seal the surface, preventing the occurrence of additional stains.
-
Denture Tablets
Before diving into the depth of the cleaning method, it makes sense to know about denture tablets. On that note, these are basically tablets used for removing stains from false teeth. Therefore, they can also be utilized for performing a similar function for plastic sinks.
On reacting with stains, denture tablets cause an effervescent reaction, making them easy to wipe away. That’s not all. They also include brightening agents that will leave your plastic or acrylic sink spick and span. So, without wasting any more time, let’s head to the steps involved in the cleaning technique.
Step 1. Drop The Tablets In The Sink
Plug in the stopper and fill up the sink with water. Now, you can begin the cleaning process by dropping 5 to 10 denture tablets in it. Once they start fizzing, allow the solution to sit for one to two hours, or even overnight.
Step 2. Draining The Sink
Keep checking the sink during the resting period. You can pull out the stopper, allowing the sink to drain as soon as the fizzing subsides.
Step 3. Wiping Down The Stains
Finally, take a wet sponge and wipe away any remaining residue of the tablets that may remain at the bottom of the sink. This should be done before the leftover debris dries or crusts.
Having said that, you can also use the sponge to wipe away the loosened stains. And for thorough cleaning, wipe the sides and bottom of the sink with detergent. Follow this up with rinsing and drying.

Using chemical cleansers or natural cleaning agents like vinegar and baking soda will definitely help you achieve the desired cleaning results. But that doesn’t give us a reason to take our plastic sinks for granted.
In other words, it is crucial to clean and maintain your sink regularly to prevent stain buildup. This will, in fact, help you keep it new for years to come.
On that note, we now conclude our informative guide. Till next time!
Related Articles
5 Best Copper Sink for Legendary Designs
7 Best Sink Protectors Reviewed
13 Best Double Bowl Kitchen Sinks
13 Best Kitchen Sink Faucets to Consider | Buyer’s Guide + Reviews
How to Repaint a Fireclay Farmhouse Kitchen Sink
13 Best Undermount Bathroom Sink
11 Best Fireclay Farmhouse Sink | Buyer’s Guide
How to Wash Dishes in a Farmhouse Sink


